New Nozzle 2.0 with Pictures
+5
Therons
liteglow
John
Tstevn
Magic-nozzle
9 posters
Page 1 of 1
 New Nozzle 2.0 with Pictures
Hi
In the last 2 Weeks i build a complete new Nozzle, because my old one shoot not that far as i want it to, it was a 6". I try using the same building method like John or Theron is using with inner rings (thank you Guys) a 8" nozzle. Yes, i have a clear stream about 12 - 14 foot.


But Today i have to break the nozzle apart, try to fix this problem.
The Problem: Not every time, but sometime when i start the pump, not a clear stream is coming out, a very strange splashing! When i shake and hit the nozzle hardly, then it stops most times and i have a clear stream .... Strange strange. Maybe some air in the sponge ... or problems with the inner rings (water turbulence).
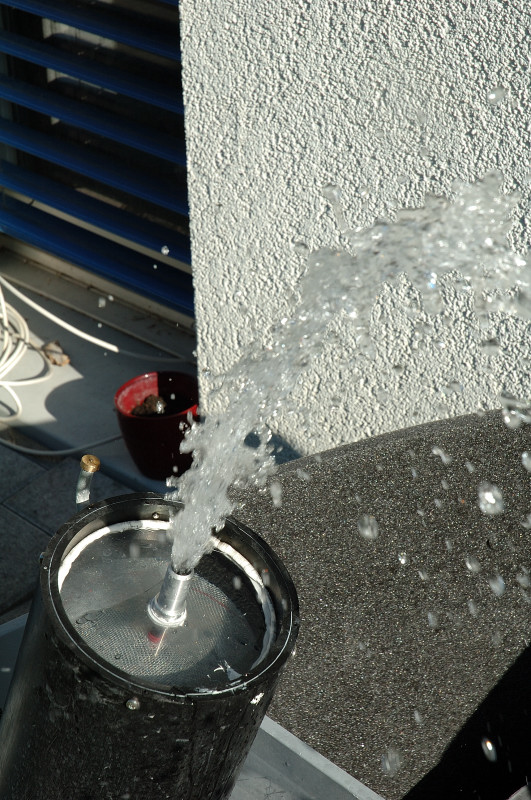
Any suggestions ? Thank you for any help.
And here the building Process:
The new Workshop:

Building the Brass nozzle:
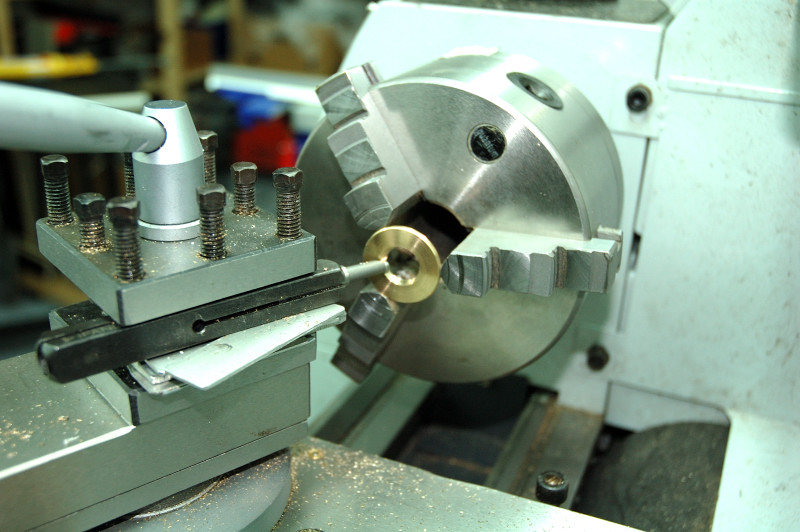
Cutting the inner rings: (thanks Theron)

Parts Ready:
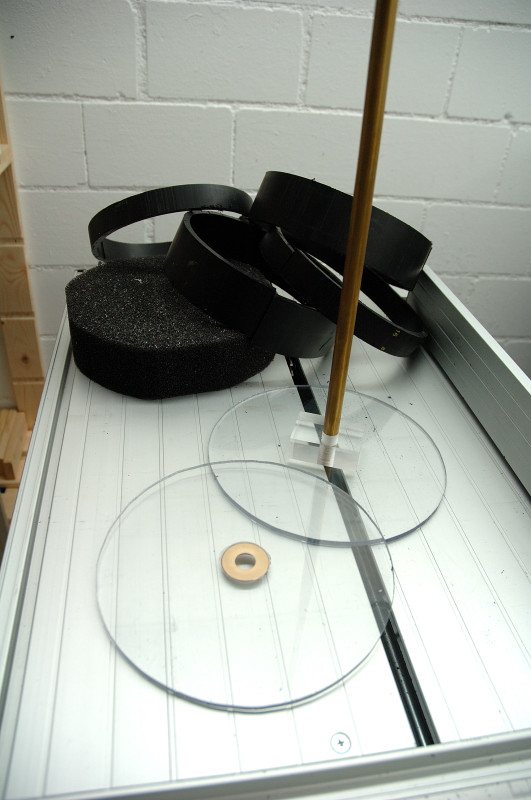
Put it together:


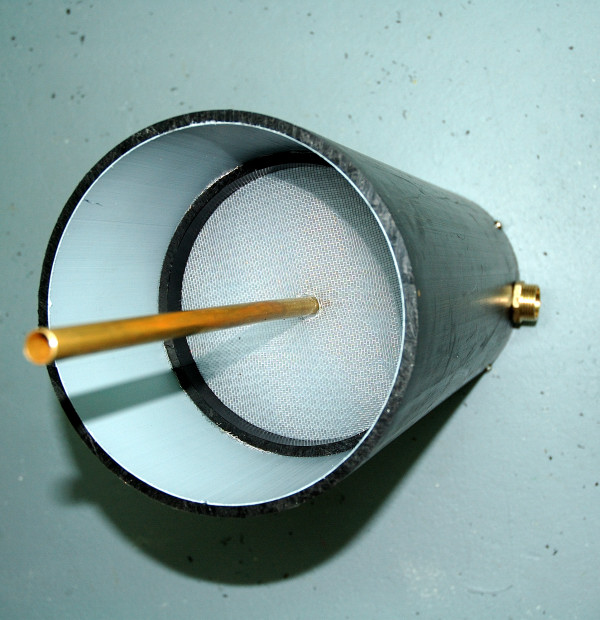
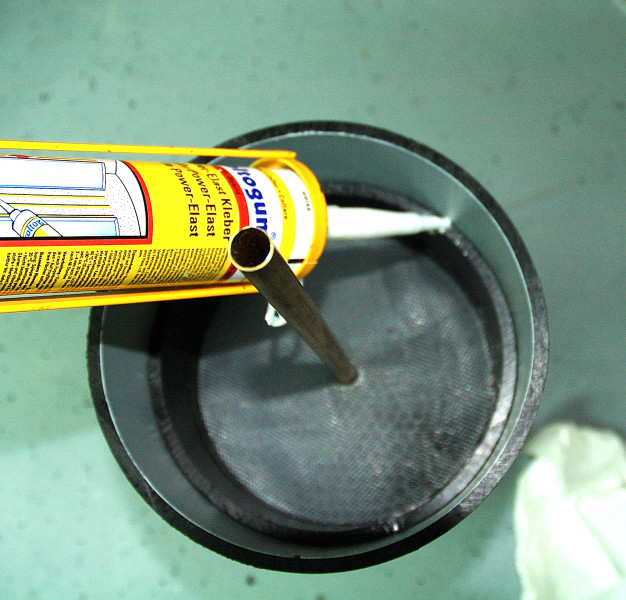
Stepper Cutter:
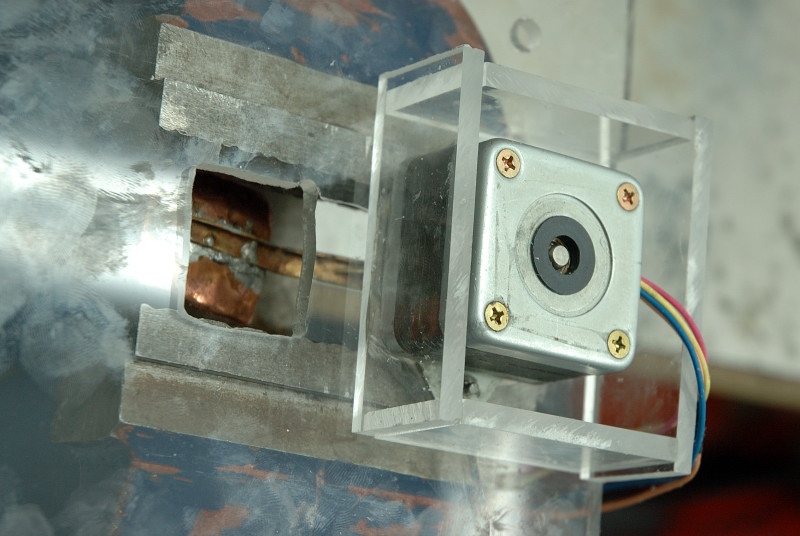
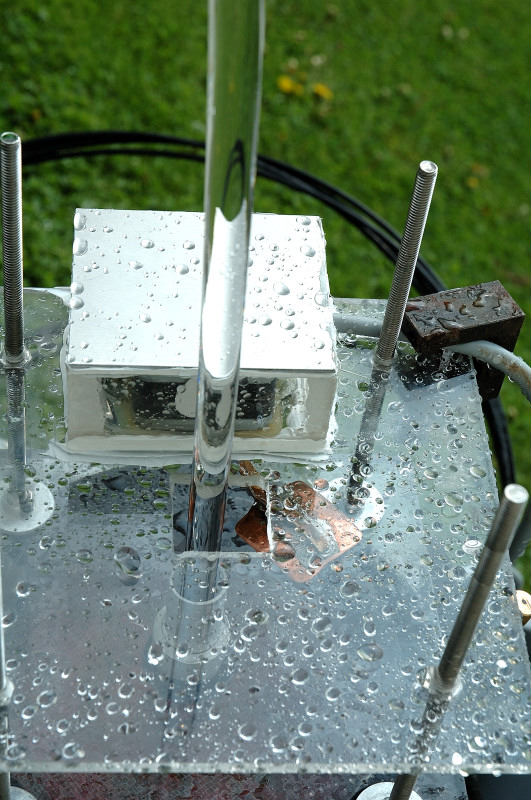
Cutter Action:
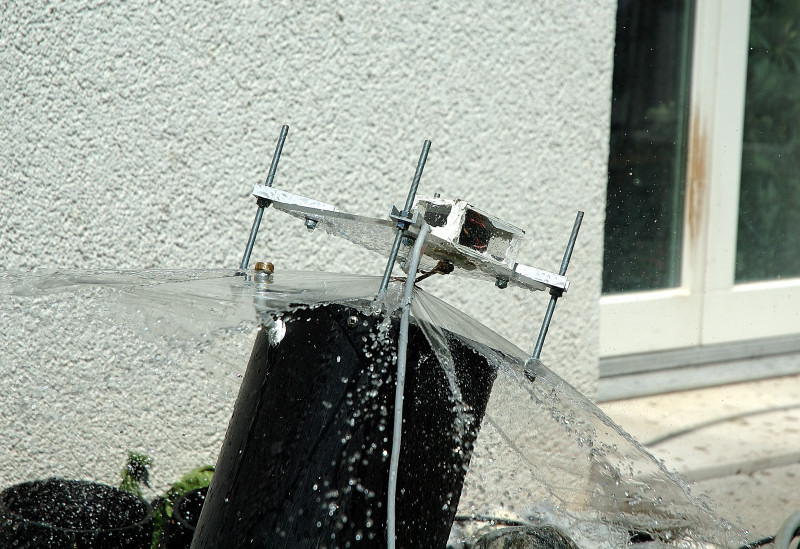
Nice nice it's working:
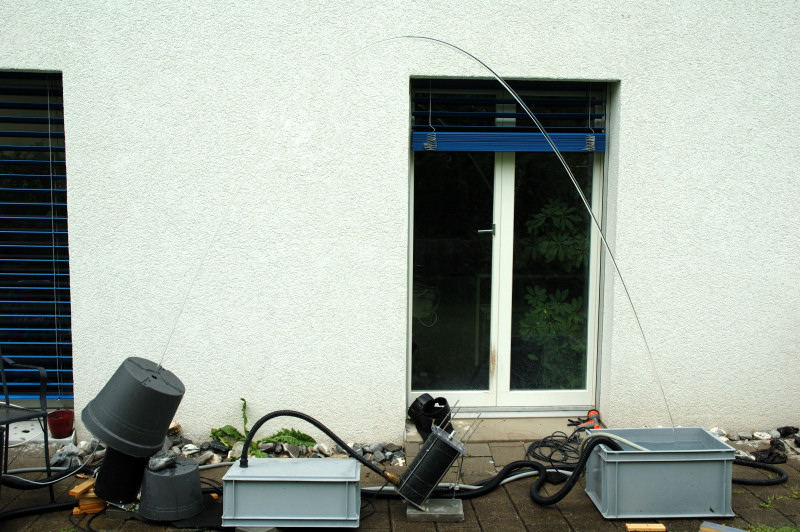
In the last 2 Weeks i build a complete new Nozzle, because my old one shoot not that far as i want it to, it was a 6". I try using the same building method like John or Theron is using with inner rings (thank you Guys) a 8" nozzle. Yes, i have a clear stream about 12 - 14 foot.
But Today i have to break the nozzle apart, try to fix this problem.
The Problem: Not every time, but sometime when i start the pump, not a clear stream is coming out, a very strange splashing! When i shake and hit the nozzle hardly, then it stops most times and i have a clear stream .... Strange strange. Maybe some air in the sponge ... or problems with the inner rings (water turbulence).
Any suggestions ? Thank you for any help.
And here the building Process:
The new Workshop:
Building the Brass nozzle:
Cutting the inner rings: (thanks Theron)
Parts Ready:
Put it together:
Stepper Cutter:
Cutter Action:
Nice nice it's working:
Last edited by Magic-nozzle on Mon Mar 29, 2010 11:12 pm; edited 2 times in total
Magic-nozzle- Nozzle Grand Master

- Posts : 287
Join date : 2009-04-02
Age : 55
Location : Europe
 Re: New Nozzle 2.0 with Pictures
Nice work, congrats on the new BABY 
I cant help but notice in your testsetup the nozzle is quite bit higher than the waterlevel in you tank, this would mean that if disconnected for a longer time the water in the nozzle will drop a lot !
Maybe thats whats causing the uncontrolled splashing ? Just a guess.....
The wire mesh in the top can actually, when wet, hold a lot of air back, you can see it if you look down in the nozzle there will be a big airpocket around the mesh. THAT will cause some serious disturbance.....
I had the same prob with one of my prototypes, solution ? Either make sure that the waterlevel never drops below the mesh in the nozzle, or, what i did, loose the top mesh all together !
Cant wait for a video of that bad boy
Tstevn- Nozzle Newbie

- Posts : 12
Join date : 2009-05-07
Age : 57
Location : Denmark
 Re: New Nozzle 2.0 with Pictures
That's really really beautiful! Your photos are stunning! I really like the action shot!
Yeah, I have to agree with both of you guys. It has to be some air that is disturbing the flow, or the ring. I used the ring method, but I also had a ring around the straws too! I don't know if that actually helps or not, but in my mind it make it easier to keep everything flowing in the same direction and speed. Like I said, though I have no evidence to support that.
If anyone has built a nozzle using rings, and didn't use a ring for the straws let me know! It would save a lot of material.
I can't really see why it would be that turbulent at the beginning. At the first my stream isn't completely laminar, but as soon as the nozzle is completely full of water you can count on it being completely laminar!
You shop looks really awesome too!! I have the space, but I don't have the tools that you have....yet.
 Re: New Nozzle 2.0 with Pictures
Thank you Stevn and John, yes i think maybe the ring after the straws and air can actuation the problem. A Friend, Karlsson (Hi Karlsson) from germany had also a nice idea that my little tube at the end can have a influence (the tube is needed for the splash protection when i cut, as you can see in the picture below), also i try to remove the mesh and the last 2 ring's inside to have a straight flow.
Actually i am building a new top with a O ring, can easy removed without silicon, just press in and secure with 3 screws. Thank you Stevn (or is Tstevn right?) and Karlsson for your help. If i have success, i show you the pictures. Hopefully today
Stevn, during testing i need this high difference because when i cut, a lot of water has to flow back in the other thank, but its a good idea, the water level
John: I Wish i hade the space you have in the video, Awesome! But i really love my new small shop, enough space and i have my 2 new machines, a Lathe and the Circular saw, that help me a lot. I was waiting so many years, but now i never want to give it away. 3 months ago it was a dark dirty room under the house, 3 Weeks working on it, and now, its a workshop.
Hava a nice day
Mario

Magic-nozzle- Nozzle Grand Master

- Posts : 287
Join date : 2009-04-02
Age : 55
Location : Europe
 Re: New Nozzle 2.0 with Pictures
UPDATE:
Yes, my new top for the nozzle works, silicone free! I used the same technique like Stevn was showng, thank you for this brilliant idea, and thank Karlsson for helping brainstorming on that.
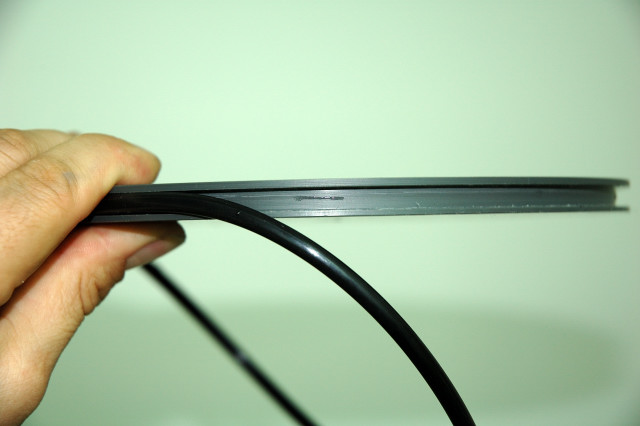
I use a 10 mm / 0.4 " PVC gray plastic plate, similar like stevn showed. A O Ring, diameter 177.17 x 5.34 mm.
I use just one ring, its enough and 100% Water tight. i removed the last mesh, put as many straws i there to hold it in place and removed all the rest of the inner rings. From the straws there is now nothing more than empty space. On the new plate i mounted the same ring outside as i had to earlier to hold the lexan plate. First i don't use a ring .., the plate was pop off and flythrough the garden ... i was very wet

 . the cool thing is to open the nozzle, relese the 4 screws, tilt the plate a little, than i can grab it. Mounting is the same process, not even a minute.
The Problem i had was not anymore, hopefully its gone by this changes.
Here some Pictures of this process:
Turning the plate and make the notch
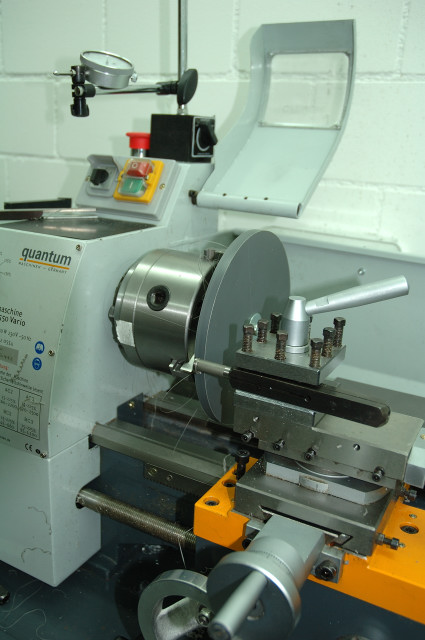
Here you can see how it looks aftter the turning
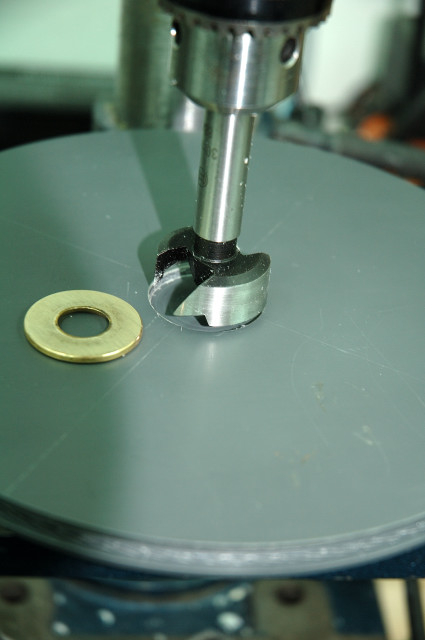
Drill a hole for the brass nozzle
Glue the nozzle in with silicone
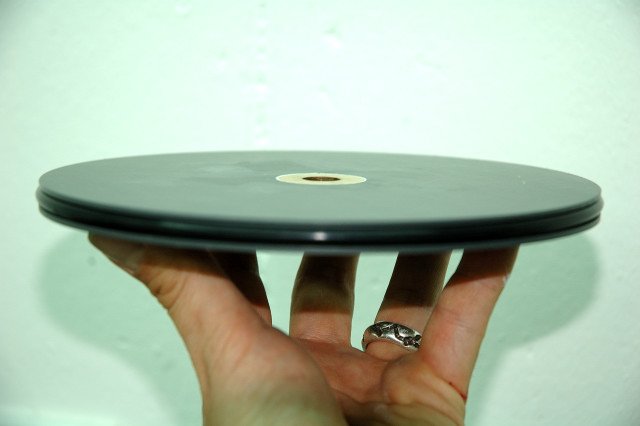
Mounting in the Big nozzle, just push in:
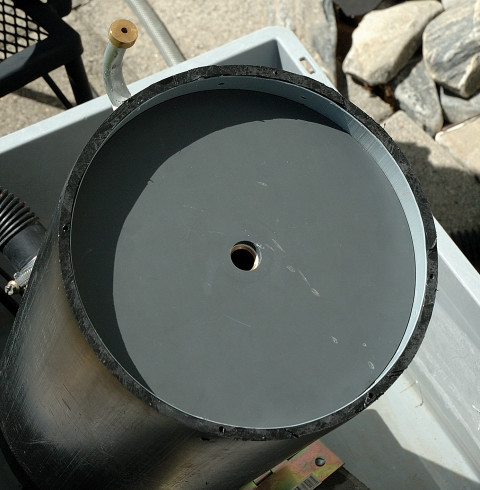
Mounting the ring to secure the plate:
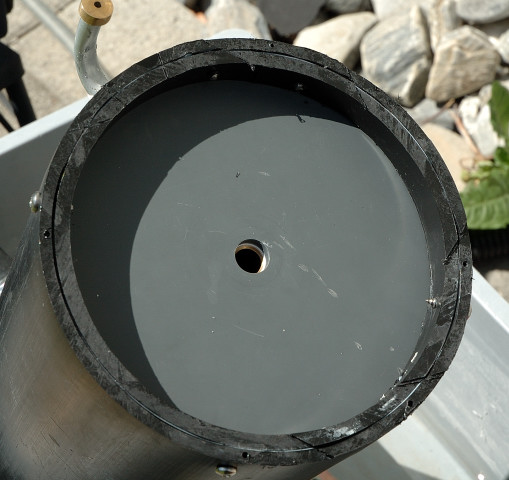
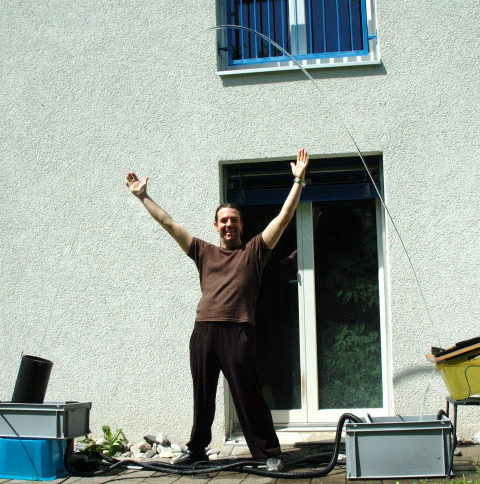
Highest i can get (Full power, with the OASE Neptun 5000, it's abot 6 meter or 19 foot), but the stream is then not 100% nice at the end, but ok :
:
Next Problem, my bottom is not thight, i think i made one of this parts also for the bottom.
Hope you like it and maybe it help's you a little building your nozzle.
Yes, my new top for the nozzle works, silicone free! I used the same technique like Stevn was showng, thank you for this brilliant idea, and thank Karlsson for helping brainstorming on that.
I use a 10 mm / 0.4 " PVC gray plastic plate, similar like stevn showed. A O Ring, diameter 177.17 x 5.34 mm.
I use just one ring, its enough and 100% Water tight. i removed the last mesh, put as many straws i there to hold it in place and removed all the rest of the inner rings. From the straws there is now nothing more than empty space. On the new plate i mounted the same ring outside as i had to earlier to hold the lexan plate. First i don't use a ring .., the plate was pop off and flythrough the garden ... i was very wet
The Problem i had was not anymore, hopefully its gone by this changes.
Here some Pictures of this process:
Turning the plate and make the notch
Here you can see how it looks aftter the turning
Drill a hole for the brass nozzle
Glue the nozzle in with silicone
Mounting in the Big nozzle, just push in:
Mounting the ring to secure the plate:
Highest i can get (Full power, with the OASE Neptun 5000, it's abot 6 meter or 19 foot), but the stream is then not 100% nice at the end, but ok
Next Problem, my bottom is not thight, i think i made one of this parts also for the bottom.
Hope you like it and maybe it help's you a little building your nozzle.

Magic-nozzle- Nozzle Grand Master

- Posts : 287
Join date : 2009-04-02
Age : 55
Location : Europe
 Re: New Nozzle 2.0 with Pictures
That is awesome !! 
I`m in a hurry now, the clock is 01:00am, and up to work 06:30
But I love the new nozzle ..
What was the problem about the bad water?
Was it because of the rings inside?
and btw, i LOVE the small metal pipe that goes from bottom to the top!!
That was a very good idea how to make sure the fiber hit the exact output
I guess I can make a pipe like that, and seal the top of it with a plexi top!
And the day I recive fiber optic, i just put it under
cheers
 Re: New Nozzle 2.0 with Pictures
liteglow wrote:That is awesome !!
I`m in a hurry now, the clock is 01:00am, and up to work 06:30
But I love the new nozzle ..
What was the problem about the bad water?
Was it because of the rings inside?
cheers
Thank you Filip, i don't now what it was, i test now many times and when it's gone, it had to do with the not straight output after the straws and a hole i found in the dubble mesh, so i cant tell exact what, maybe a combination of several things. I also expand the top tube a little, i hope the problem is really gone now.

Magic-nozzle- Nozzle Grand Master

- Posts : 287
Join date : 2009-04-02
Age : 55
Location : Europe
 Re: New Nozzle 2.0 with Pictures
ok 
Glad it`s working now..
btw: I discovered that more space from the straws and to the output(on top) is better than more space on the bottom..
Glad it`s working now..
btw: I discovered that more space from the straws and to the output(on top) is better than more space on the bottom..
 Re: New Nozzle 2.0 with Pictures
Mario,
I've been at Lake Powell for the past few days watching the rain (in the desert
 ) create upside down fountains (waterfalls off from 150 meter high red sandstone cliffs
  ) so I haven't been able to visit the forum for a while.
Great nozzle progress and great work shop!! I wish I had a lathe - or a good friend with a lathe. I think I will have to have end plates made for the final units so they can be easily removed to clean.
In your picture with the non-laminar flow it looked like there was air in the upper part of the tube, but I guess you have the problem resolved.
I didn't use a split ring around the straws on either of my nozzles. The straws fill the entire space and they are stiff enough to support the rings on each end. I didn't want to use that much tubing. I can't see how not having the ring would change the flow.
Do you use a jitter filter with your pump or does it provide smooth enough flow. I couldn't see a filter in your photos.
Theron
I've been at Lake Powell for the past few days watching the rain (in the desert
Great nozzle progress and great work shop!! I wish I had a lathe - or a good friend with a lathe.
In your picture with the non-laminar flow it looked like there was air in the upper part of the tube, but I guess you have the problem resolved.
I didn't use a split ring around the straws on either of my nozzles. The straws fill the entire space and they are stiff enough to support the rings on each end. I didn't want to use that much tubing. I can't see how not having the ring would change the flow.
Do you use a jitter filter with your pump or does it provide smooth enough flow. I couldn't see a filter in your photos.
Theron
Therons- Nozzle Novice

- Posts : 53
Join date : 2009-04-11
Location : North Salt Lake, Utah, USA
 Re: New Nozzle 2.0 with Pictures
Therons wrote:Mario,
I've been at Lake Powell for the past few days watching the rain (in the desert
) create upside down fountains (waterfalls off from 150 meter high red sandstone cliffs
) so I haven't been able to visit the forum for a while.
Great nozzle progress and great work shop!! I wish I had a lathe - or a good friend with a lathe.I think I will have to have end plates made for the final units so they can be easily removed to clean.
In your picture with the non-laminar flow it looked like there was air in the upper part of the tube, but I guess you have the problem resolved.
Do you use a jitter filter with your pump or does it provide smooth enough flow. I couldn't see a filter in your photos.
Theron
Hi Theron
Tank You. Nice you are Back.
Wow, i just watched some pictures around Lake Powel, how wonderful. I Love it, i Wish i have a chance to see this some day, rally Nice. Impressive are the waterfalls ... Amazing.
Yes the lathe is so cool, its brand new and i use it every week for some parts. With 250 x 550 mm is it enough big for the nozzle stuff, *SMILE* I wait since years for one like this.
The non-laminar flow. I think i found the Problem, its my OASE PUMP! Yes, cant believe it, i am not 100% sure but there was a reduction on the outlet of the pump, i didn't recognize that, now i removed it and it seems now no more Problems. Strange.
I also do not use a ring around the straws, and i removed the last mesh and the tubing inside, no problem, the straws holding in place. Flow is nice. i Think it is more important to have a straight flow at the end. I did not recognize anything, with, or without the mesh.
But this cutter, DAMN, I am now since 2 Months on this thing, but far away from a perfect cut. The Problem is the shaking and bring the water away with no splash back. I go now forward, finish it and it is like it is.
Have nice Day and i cant wait see your Cutter Working.
Mario

Magic-nozzle- Nozzle Grand Master

- Posts : 287
Join date : 2009-04-02
Age : 55
Location : Europe
 Re: New Nozzle 2.0 with Pictures
Mario: Do you have any pictures of the pump (maybe inside pictures) !
I wonder if your pump is almost the same as mine in design ?
I have received all my 4 pumps so now I have total of 19200 ltr,hour system
But I still wait for my tubes
I wonder if your pump is almost the same as mine in design ?
I have received all my 4 pumps
But I still wait for my tubes
 Re: New Nozzle 2.0 with Pictures
Sorry, no inside Pictures iof the pump, its trhe OASE Neptun 5000, many pictures on the internet.
Th Pump is so simple, just a snail actuation or how this is called in english.
Mario
Th Pump is so simple, just a snail actuation or how this is called in english.
Mario

Magic-nozzle- Nozzle Grand Master

- Posts : 287
Join date : 2009-04-02
Age : 55
Location : Europe
 Re: New Nozzle 2.0 with Pictures
Mario,
How do you attach the blade to the stepper motor? I've decided to simplify my cutter system to what you have. I also found these stepper motors that can be driven right from a microcontroller.
I was working on something that I believe had the potential of being better but have been unable to get it working due to the complexity of the design. SIMPLER IS ALMOST ALWAYS BETTER. Specially since I have to make everything myself. If I had a complete machine shop (and a machinist) then things would be different.
 Re: New Nozzle 2.0 with Pictures
Hello,
My name is Karlsson and I live in Germany. I am a friend of Mario.
Sorry, but my English is very, very bad. I hope you can understand me.
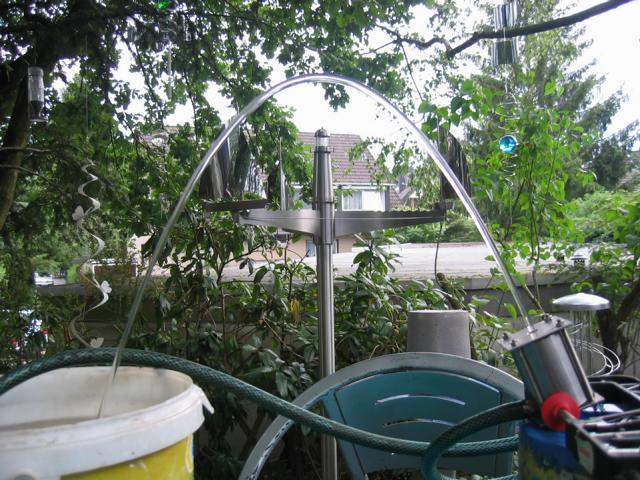
I'm trying a small nozzle to build.
It is 70 mm high and has a diameter of 50 mm. Die hole is 1 / 4 ".

To John:
Mario is on vacation in Italy.
I do not know exactly when he comes back.
Cheers Karlsson
My name is Karlsson and I live in Germany. I am a friend of Mario.
Sorry, but my English is very, very bad. I hope you can understand me.
I'm trying a small nozzle to build.
It is 70 mm high and has a diameter of 50 mm. Die hole is 1 / 4 ".

To John:
Mario is on vacation in Italy.
I do not know exactly when he comes back.
Cheers Karlsson

Karlsson- Nozzle Newbie

- Posts : 7
Join date : 2009-07-30
Location : Germany
 Re: New Nozzle 2.0 with Pictures
Oh, thanks for letting me know about that!
It looks really good!!!! How far does it shoot? That is really awesome!
I'm trying a small nozzle to build.
It is 70 mm high and has a diameter of 50 mm. Die hole is 1 / 4 ".
It looks really good!!!! How far does it shoot? That is really awesome!
 Re: New Nozzle 2.0 with Pictures
Thanks! But it can not shoot very far. Approximately 40 - 50 cm.


Karlsson- Nozzle Newbie

- Posts : 7
Join date : 2009-07-30
Location : Germany
 Re: New Nozzle 2.0 with Pictures
Is that based on the same design as all the others (straws and filter inside)?
 Re: New Nozzle 2.0 with Pictures
Inside is a perforated plate, a sponge and a mesh. No straws.
I will make a few pictures tomorrow and a new topic.
I will make a few pictures tomorrow and a new topic.

Karlsson- Nozzle Newbie

- Posts : 7
Join date : 2009-07-30
Location : Germany
 Re: New Nozzle 2.0 with Pictures
I can only get mine to shoot about 3 or 4 feet before beam breaks apart....I wish someone here would take one of there 8inch nozzles and see what happens when you output hole is only .250inches....like maybe Mario  ....i would like to see what the physical limits of a .250inch beam is....
projeto- Nozzle Newbie

- Posts : 11
Join date : 2009-07-27
 Re: New Nozzle 2.0 with Pictures
John wrote:Mario,
How do you attach the blade to the stepper motor? I've decided to simplify my cutter system to what you have. I also found these stepper motors that can be driven right from a microcontroller.
I was working on something that I believe had the potential of being better but have been unable to get it working due to the complexity of the design. SIMPLER IS ALMOST ALWAYS BETTER. Specially since I have to make everything myself. If I had a complete machine shop (and a machinist) then things would be different.
Hi John, i am right back from my holidays *
The mount of the blade is easy. I take some pictures for you.
The stepper needs a 0 Point detection, i do this with a magnet on the blade and a magnet sensor (Reed).
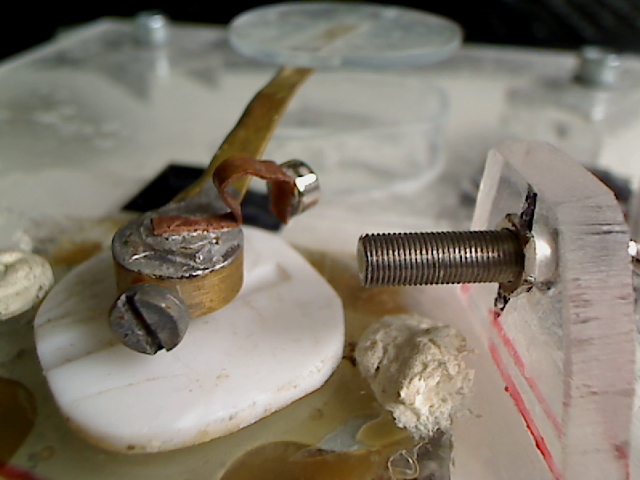
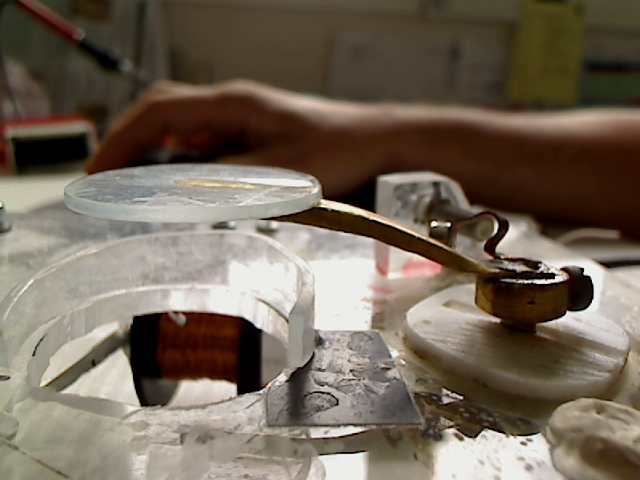
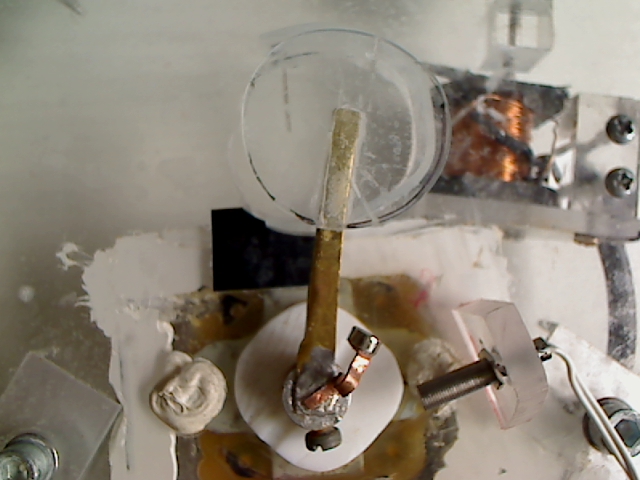
This is my new needle poker, wirks nice! Better than my knocker.
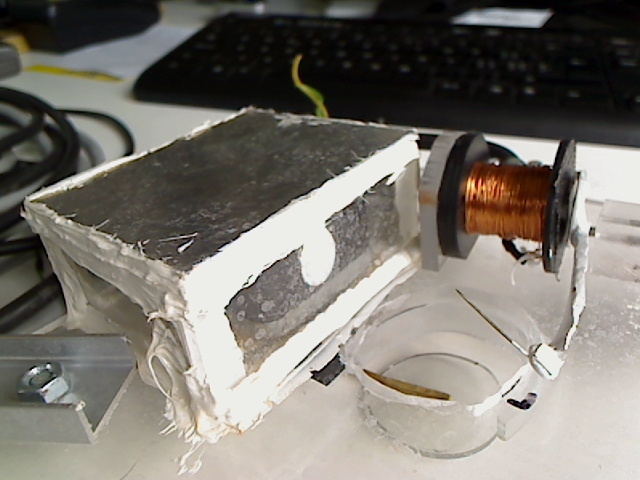
I think this will help.
Cheers

Magic-nozzle- Nozzle Grand Master

- Posts : 287
Join date : 2009-04-02
Age : 55
Location : Europe
 Re: New Nozzle 2.0 with Pictures
Karlsson wrote:Hello,
My name is Karlsson and I live in Germany. I am a friend of Mario.
Sorry, but my English is very, very bad. I hope you can understand me.
I'm trying a small nozzle to build.
It is 70 mm high and has a diameter of 50 mm. Die hole is 1 / 4 ".
Cheers Karlsson
HI KARLSSON, OHH MAN THIS LOOKS AMAZIG! really nice Job and nice welding! i Love your designs, looks so professional!
The stream is so cute, maybe i try to build one in my next life
Please let us now when you have more pictures.
CHEERS Mario

Magic-nozzle- Nozzle Grand Master

- Posts : 287
Join date : 2009-04-02
Age : 55
Location : Europe
 Re: New Nozzle 2.0 with Pictures
projeto wrote:I can only get mine to shoot about 3 or 4 feet before beam breaks apart....I wish someone here would take one of there 8inch nozzles and see what happens when you output hole is only .250inches....like maybe Mario....i would like to see what the physical limits of a .250inch beam is....
Hi, Jes, this is very interesting, but i have no time to do this, i want to finish my big one soon and i need every minute now.

Magic-nozzle- Nozzle Grand Master

- Posts : 287
Join date : 2009-04-02
Age : 55
Location : Europe
 Re: New Nozzle 2.0 with Pictures
Magic Nozzle - How do I figure out what size O-ring to use and what size groove to cut out of the top and bottom plates if I choose to use your O-ring set up.
covewi- Nozzle Pro

- Posts : 248
Join date : 2009-06-07
 Re: New Nozzle 2.0 with Pictures
covewi wrote:Magic Nozzle - How do I figure out what size O-ring to use and what size groove to cut out of the top and bottom plates if I choose to use your O-ring set up.
Hi, i used this PDF to calculate the O ring setup, diameter and deep of the grove , sory its in german but very usefull, all you need to know about it. http://www.tss.trelleborg.com/com/www/media/downloads/catalogs/o_ring_de.pdf
The idea is from someone els in this forum, but i cant find the page at the moment, he was the first with this brilliant idea of o rings and a top. Try to find his page, there are more details. Its the nice project with a stainless nozzle.

Magic-nozzle- Nozzle Grand Master

- Posts : 287
Join date : 2009-04-02
Age : 55
Location : Europe
 Here's some more help
These guys have lots of help and design advice on their site
www.marcorubber.com
I have gotten my o-rings from here and they are fast and cheap
www.marcorubber.com
I have gotten my o-rings from here and they are fast and cheap
pbracer- Nozzle Newbie

- Posts : 33
Join date : 2009-04-19
 Similar topics
» My Project
» air in the nozzle
» Works perfectly - 1st time - fewest tools required
» automatic air bleed valve
» new one nozzle
» air in the nozzle
» Works perfectly - 1st time - fewest tools required
» automatic air bleed valve
» new one nozzle
Page 1 of 1
Permissions in this forum:
You cannot reply to topics in this forum|
|
|

