12 foot tall laminar jet - thanks for the help!
4 posters
Page 1 of 1

12 foot tall laminar jet - thanks for the help!
![]() Deuce Sun Oct 18, 2015 11:43 am
Deuce Sun Oct 18, 2015 11:43 am
Hi all,
A few weeks ago I secured a project that requires 6 x 12' tall laminar jets, with a throw of approx 8' Each had to be lit up from a fibre optic light source. It didn't take me long to realise that the commercially available jets generally maxed out at around 7' with an 8' throw. So I had just one week to develop my own, thank god I found this forum!!! I think I have read practically every single thread throughout. The basic principle I already understood just fine, but I needed to understand the detail and the small mistakes others have made in their designs, as I didn't have time to be making my own mistakes or going off on a voyage of discovery.
To demonstrate how useful this forum has been to me, I thought I would register and post a log of the project...
Prototype 1
The first thing I needed to do was build a basic jet, just to play around with pump types/nozzle types and generally get a feel for working with laminar flow. I read this forum in the evening, and the next day headed to a local hardware store and picked up a random assortment of pipe/straws/sieves. By lunchtime it was all cobbled together, leaking all over the place but I did have a smooth laminar jet, albeit only up to around 4' high.
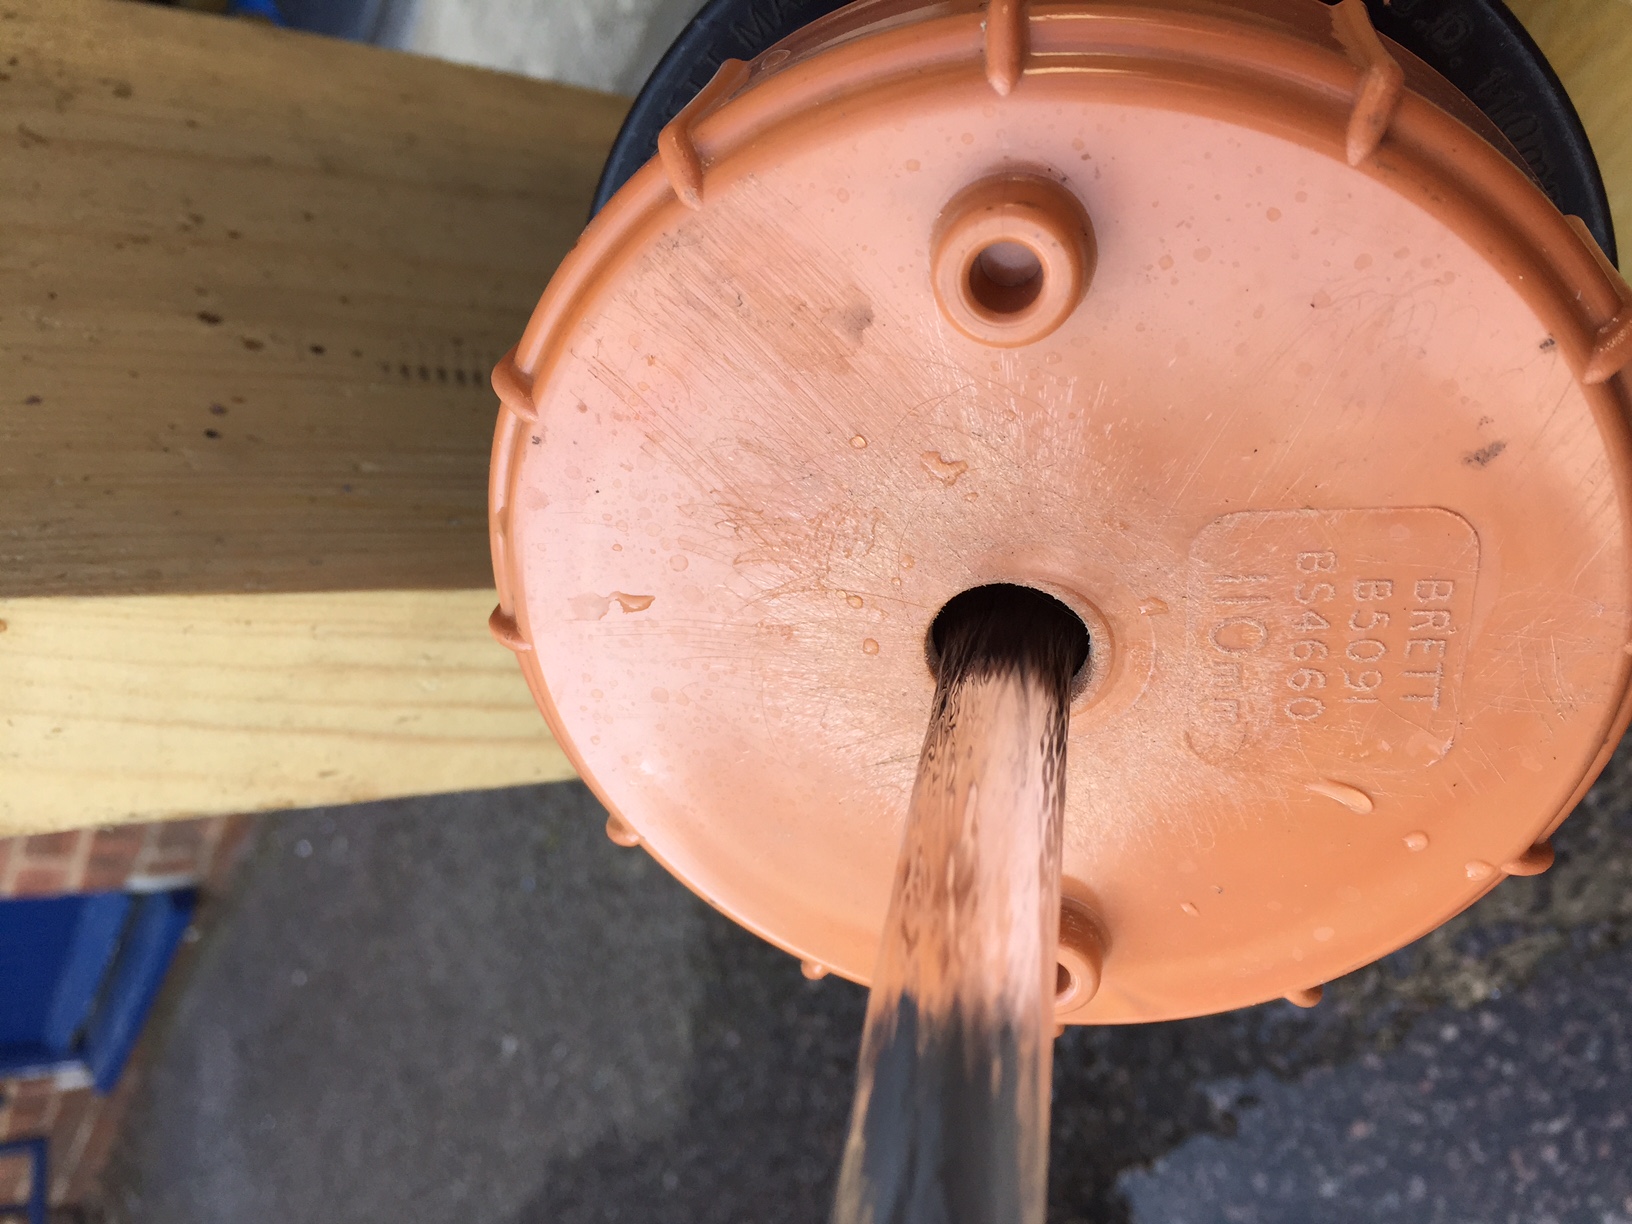
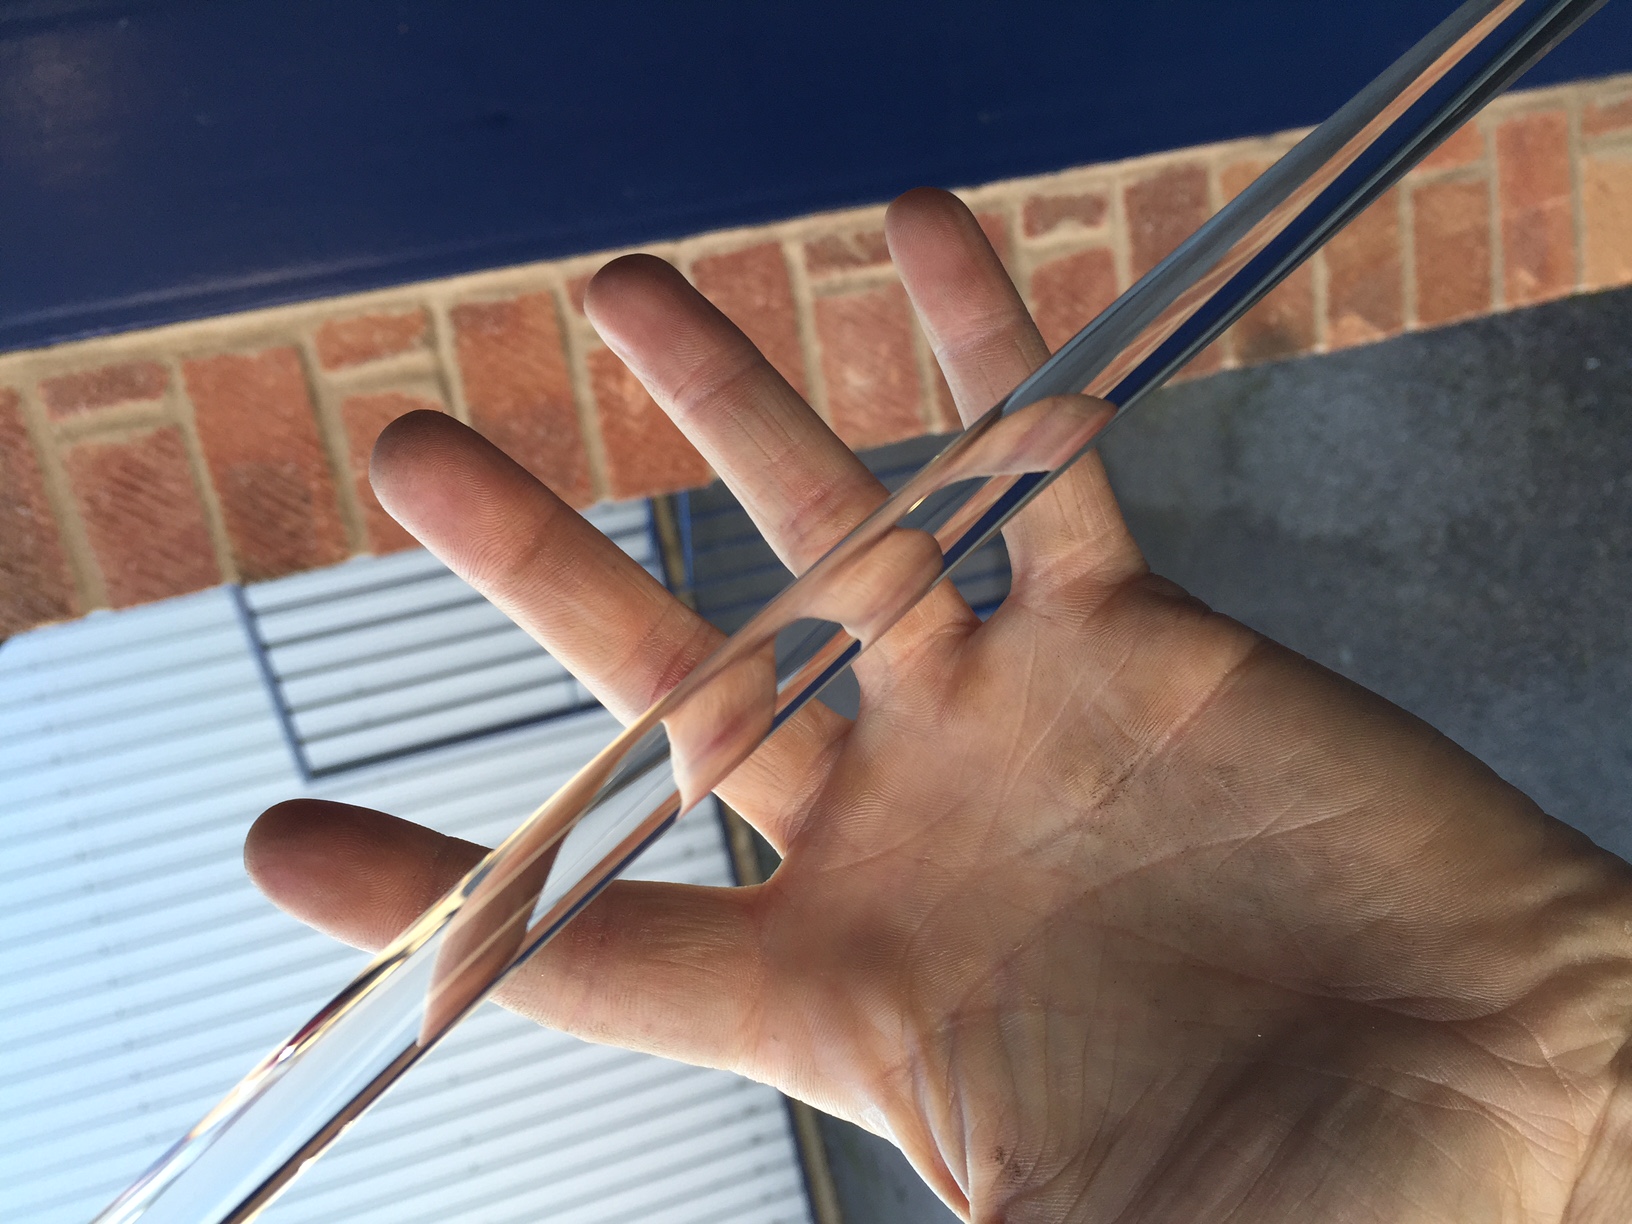
The jet nozzle was 4" in diameter. the outlet was an M10 stainless steel washer. The water source was just mains tap water fed through an expansion vessel to to smooth out the pressure. What I learned was that the very obvious imperfections in the nozzle (pic 1) were exaggerated the longer the jet, and as a result it would break apart too soon. In picture 2 you see the same nozzle, but the washer was ground down and the resulting flow was much cleaner. But the nozzle could still not exceed 5' height, as the nozzle itself was too narrow to remove turbulance from water moving at the required velocity. Nonetheless, for a few hours effort it was very rewarding to have a working laminar nozzle! Just a shame it was 7' below my target height...
Prototype 2 - Day 2
Technically day 3 as I had to wait for a load of parts I ordered to turn up. I had calculated that if the nozzle was perfectly designed, 12' would be possible using a nozzle just 130mm internal diameter. This is a lot narrower than others on here seem to use, but I suspect that the reason people finally get their 'perfect result' has less to do with the nozzle diameter and more to do with experience and improving the other components.
So to be safe I ordered some 160mm pressure PVC pipe and a load of flanges/gaskets etc so I could build a solid modular nozzle to take the internal components.

This got me to around 8' height without breaking up. I asserted that the reason for this new limit was probably me still trying to use a washer (which I had reduced to 8mm in these pics) rather than getting something machined properly. I was also injecting the water into the nozzle from the centre of the nozzle base, whereas I knew other were injecting it through the side wall of the nozzle to allow it to spin within the nozzle and move through the sponge and tubes more evenly. I also still had to figure out how to design the nozzle to be neater and accept an acrylic tube to pass the fibre optic light through the nozzle.
Prototype 3 - Day 3
So, skipping forwards another day that was spent waiting for more components... I had my 3rd nozzle. this one needed to work, as I had to build 6 of them and meet my deadline to get the shipped out to the project they're for!
This time everything was kind of the same in principal, but all of a much higher standard. The basic (bendy) straws I had been using so far were replaced with higher quality and narrower (3.5mm) straight straws, of a much higher quality material. Their diameter was measured with a micrometer and I used CAD software to calculate the correct volume to pack in to ensure they were as tight as possible but not so tight they would deform at all. They were built up within the nozzle very carefully to ensure no two straws crossed.
The outlet was just 1mm stainless steel plate drilled very carefully with a cobalt bit to 9mm. One thing I had discovered by this point is that there is no reason to put a 'razor edge' on the outlet. If you look carefully at a flowing nozzle you can see that the water contracts as it passes the inner edge of the outlet, so it makes no difference if the outlet is chamfered or not, as the water won't touch any of the material after it has passed the hard inner edge anyway. I think that using machine turned outlets actually causes a bigger problem too - as they can only be the diameter the lathe can handle, which means they must be fastened to another plate or cap to locate them to the top of the nozzle - however they're fixed has to introduce turbulence as the surface can never be totally perfect if two different materials are used (due to the water passing less cleanly over different materials). So my outlet nozzle was a stainless disc the diameter of the nozzle itself, with a single hole drilled in the centre as an outlet, and a second hole drilled and tapped at the top edge to accept a small valve to bleed trapped air. Therefore, the water in the nozzle encounters nothing other than smooth stainless sheet until it finds the outlet hole in the centre.
I also used finer grades of sponge in the nozzle, cleaned up any rough edges added a little extra length to allow the water to settle as evenly as possible before encountering the new skinny tubes.
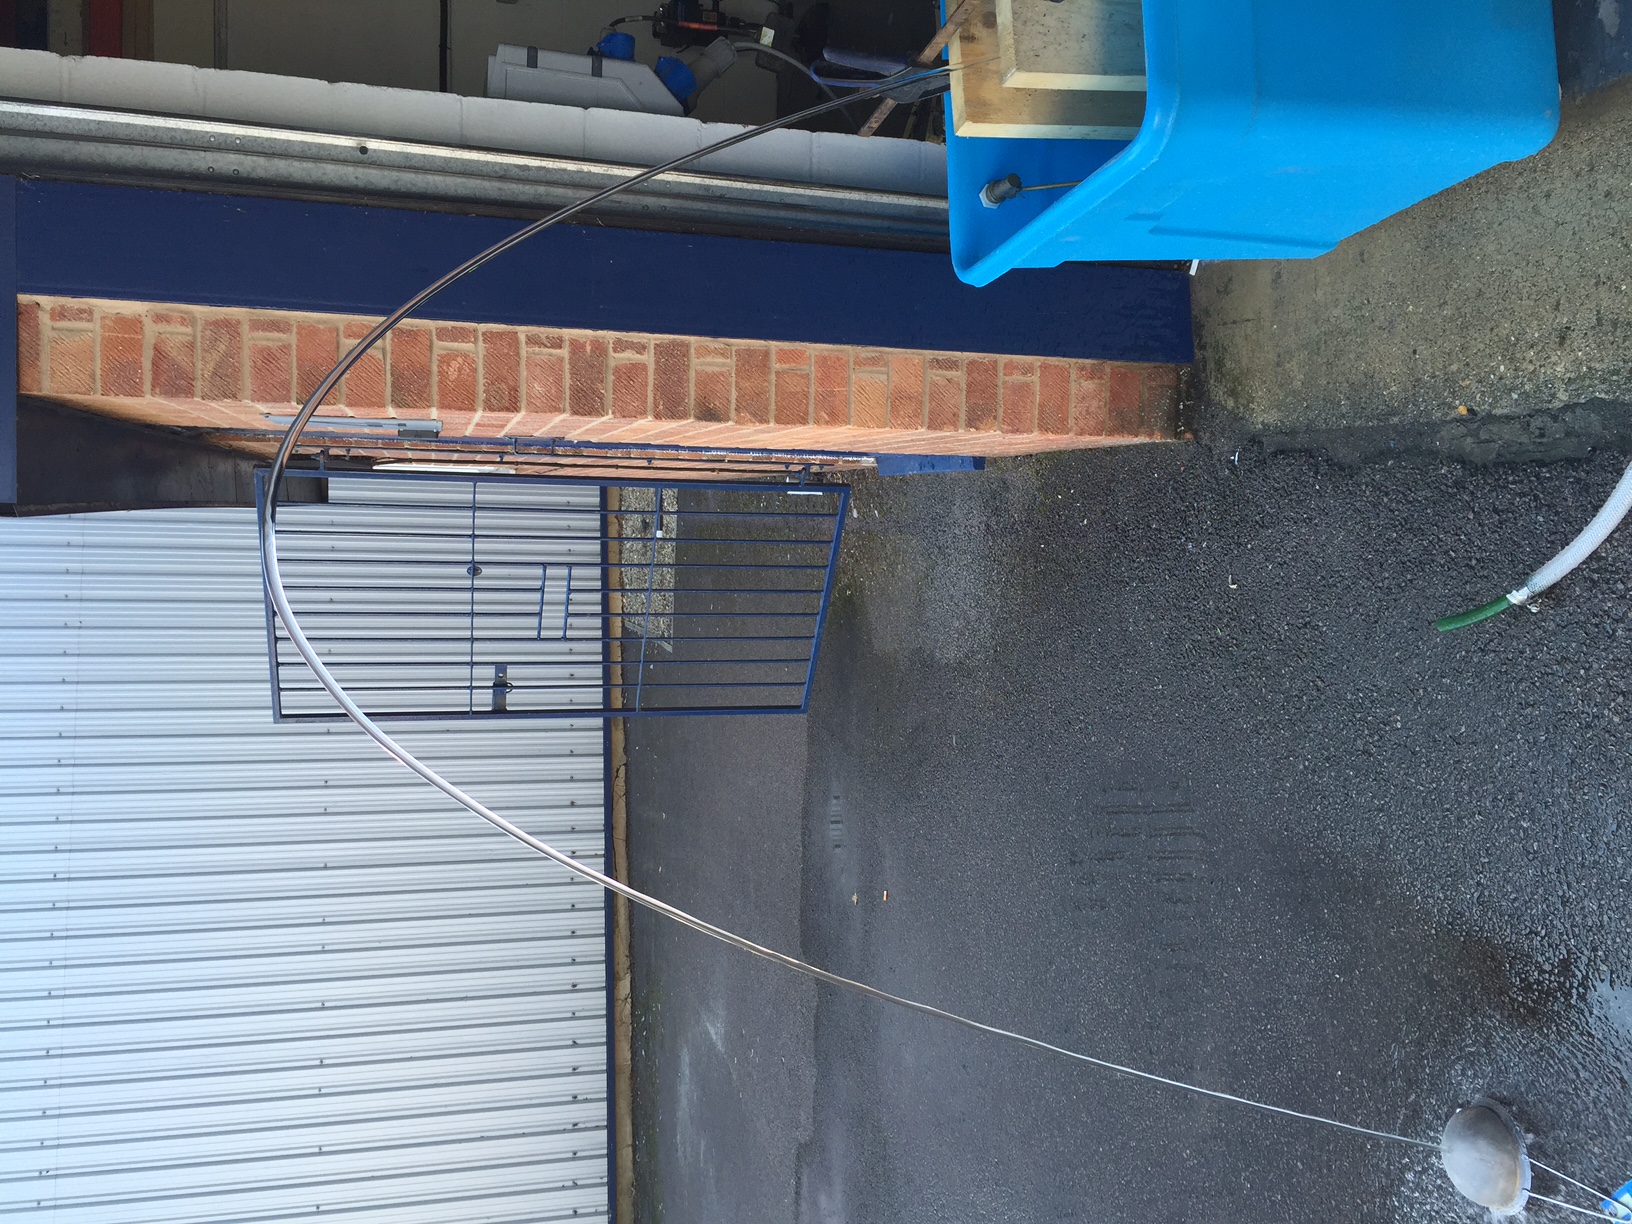
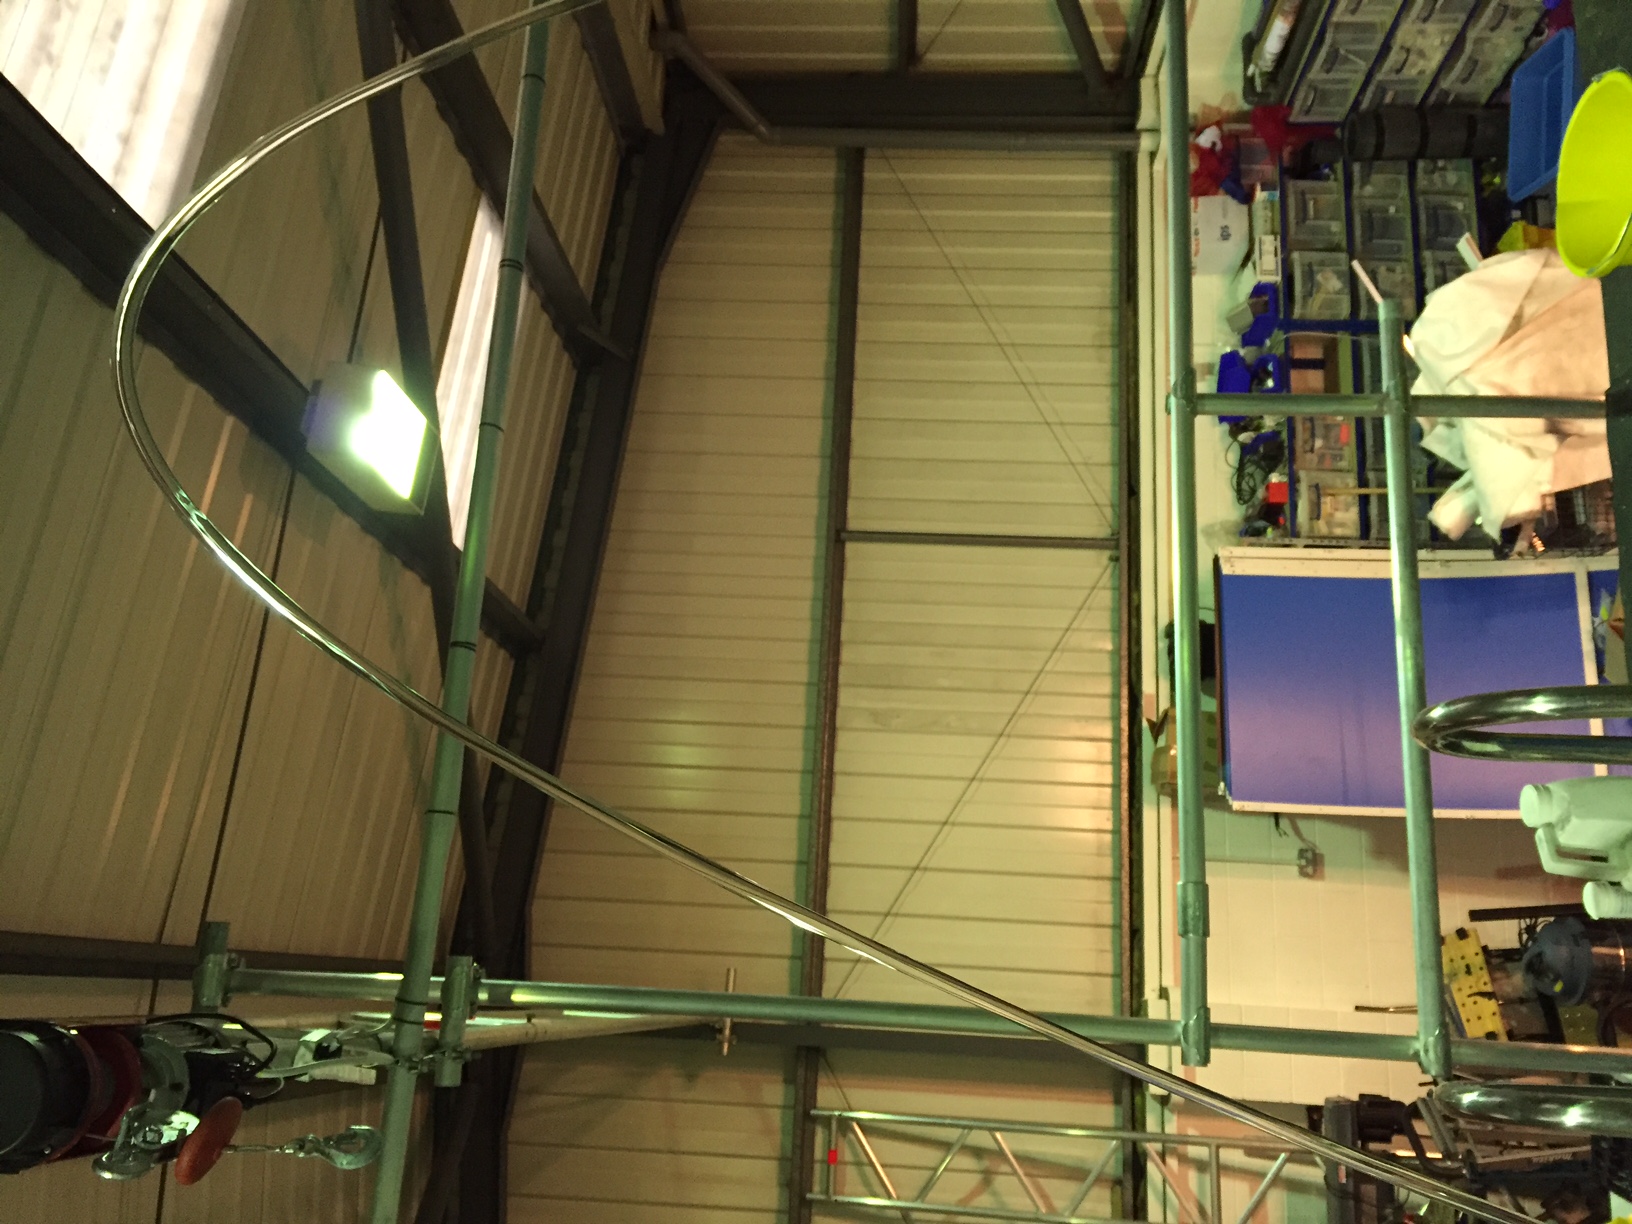
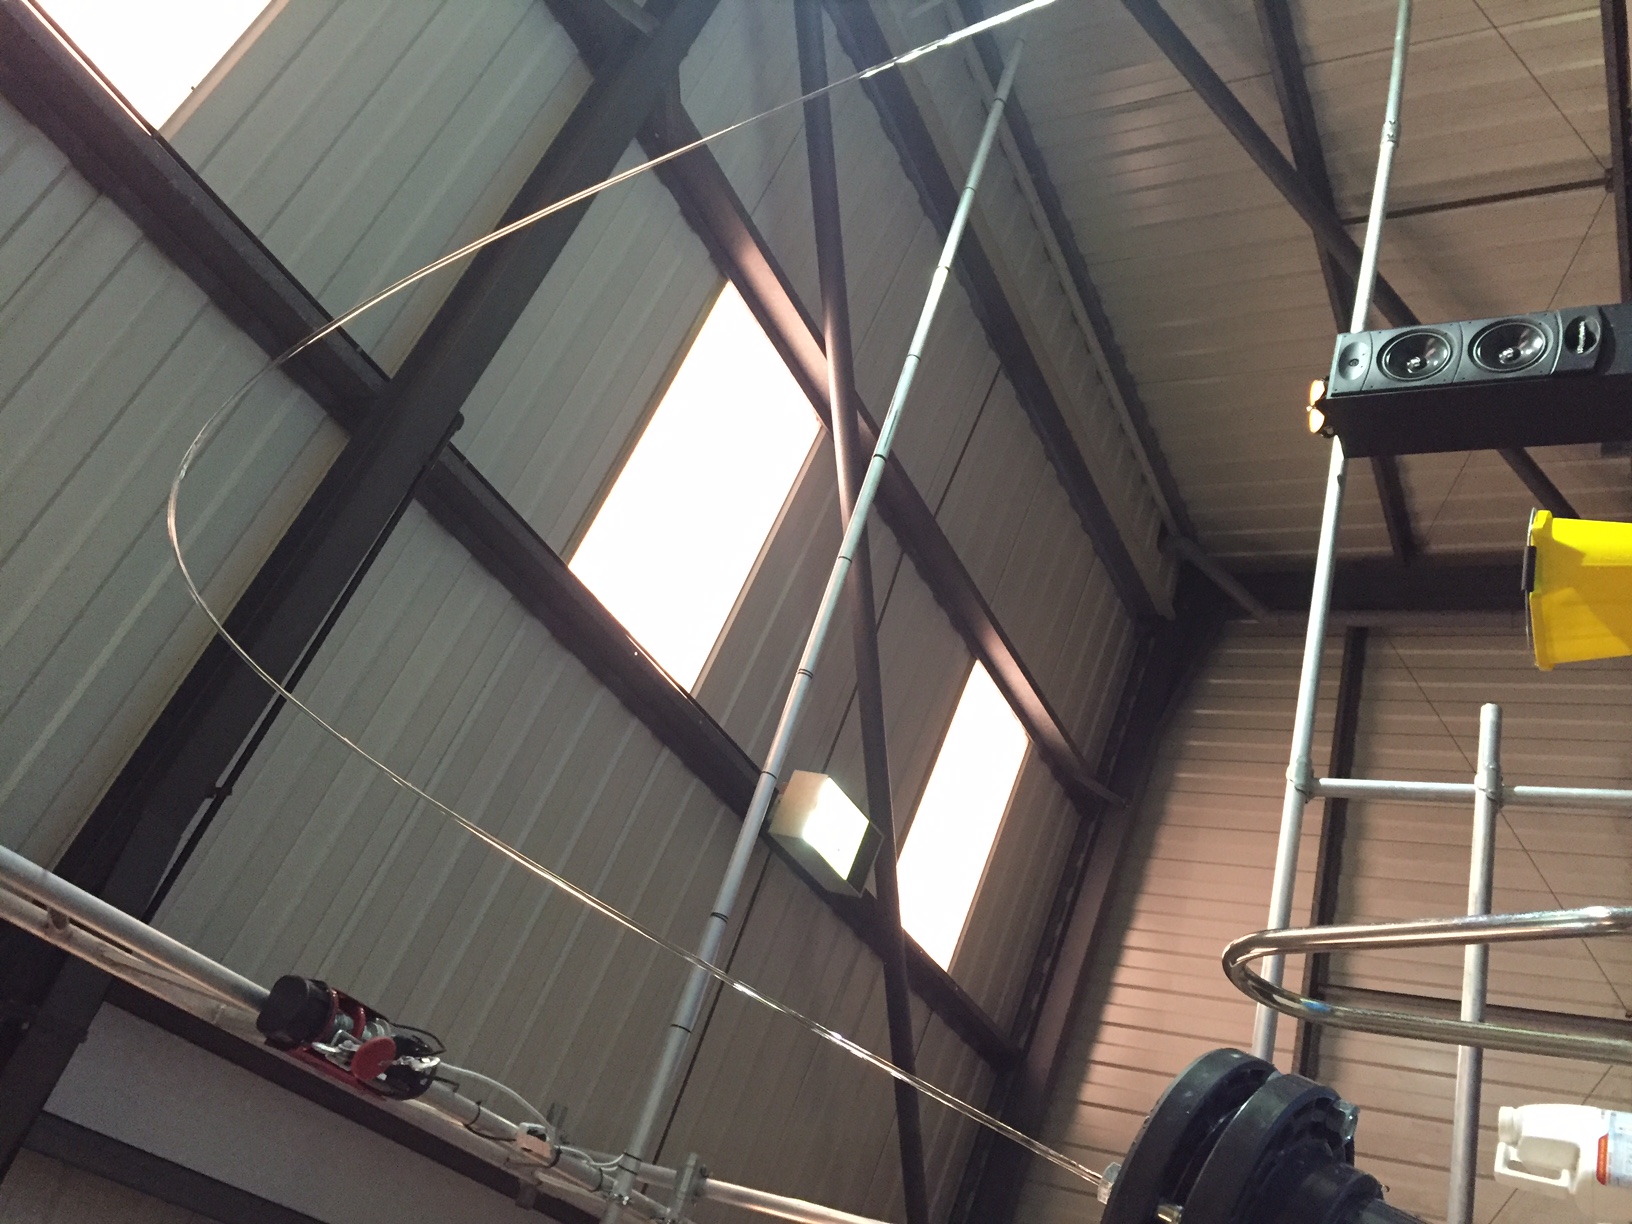
The end result achieved the 12' height on the first run - there is just one image below for now but if you view the youtube link you can see the full height, and that the laminar stream does enter the water softly as it's still holding together well. The second video is the same nozzle turned up to about 14' (just be messing a round!) and with the fibre optic light running.
And finally I swapped to a multi stage pump as I know they deliver very smooth flow. I coupled this with an inverter with frequency control so I could precisely control the speed of the pump (and iron out voltage spikes) and then sent the flow to the jet via an expansion vessel charged to 1.2bar. The jet runs at 0.9 bar so the small pressure differential in the vessel easily softens any remaining fluctuations.
Sorry about the video quality - this is all on iPhone at the workshop..
So I just wanted to say a big thank you to all the guys who have built their own nozzles and shared their experiences. It really has been of great value.
For those of you that want to know the specs of the final nozzles:
Diameter: 160mm (plus the width of the flanges)
Length: 550mm
Jet height: 12' as all laminar, 20' as laminar until about 3/4 where it breaks up
Flow rate: 17 lpm
Pressure at pump: 0.8bar
Pump type: Multi stage centrifugal (the multiple stages remove most pressure spikes)
Low pass filter: NONE - I use expansions vessels, they work the same way by using an air pocket to act as a shock absorber but are waaaayyyyyy better at the job and can be pressurized to acheive the best result.
Outlet nozzle: 9mm non chamfered, non turned. Just drilled to give a perfect 90 degree hard edge.
Light source: 48w LED fiber optic projector.
Air bleeding: a simple 4mm ID tap with silicone tube attached, this continuously removes air/water from the top of the nozzle and returns it back to the pumps sump pool.
A few weeks ago I secured a project that requires 6 x 12' tall laminar jets, with a throw of approx 8' Each had to be lit up from a fibre optic light source. It didn't take me long to realise that the commercially available jets generally maxed out at around 7' with an 8' throw. So I had just one week to develop my own, thank god I found this forum!!! I think I have read practically every single thread throughout. The basic principle I already understood just fine, but I needed to understand the detail and the small mistakes others have made in their designs, as I didn't have time to be making my own mistakes or going off on a voyage of discovery.
To demonstrate how useful this forum has been to me, I thought I would register and post a log of the project...
Prototype 1
The first thing I needed to do was build a basic jet, just to play around with pump types/nozzle types and generally get a feel for working with laminar flow. I read this forum in the evening, and the next day headed to a local hardware store and picked up a random assortment of pipe/straws/sieves. By lunchtime it was all cobbled together, leaking all over the place but I did have a smooth laminar jet, albeit only up to around 4' high.
The jet nozzle was 4" in diameter. the outlet was an M10 stainless steel washer. The water source was just mains tap water fed through an expansion vessel to to smooth out the pressure. What I learned was that the very obvious imperfections in the nozzle (pic 1) were exaggerated the longer the jet, and as a result it would break apart too soon. In picture 2 you see the same nozzle, but the washer was ground down and the resulting flow was much cleaner. But the nozzle could still not exceed 5' height, as the nozzle itself was too narrow to remove turbulance from water moving at the required velocity. Nonetheless, for a few hours effort it was very rewarding to have a working laminar nozzle! Just a shame it was 7' below my target height...
Prototype 2 - Day 2
Technically day 3 as I had to wait for a load of parts I ordered to turn up. I had calculated that if the nozzle was perfectly designed, 12' would be possible using a nozzle just 130mm internal diameter. This is a lot narrower than others on here seem to use, but I suspect that the reason people finally get their 'perfect result' has less to do with the nozzle diameter and more to do with experience and improving the other components.
So to be safe I ordered some 160mm pressure PVC pipe and a load of flanges/gaskets etc so I could build a solid modular nozzle to take the internal components.
This got me to around 8' height without breaking up. I asserted that the reason for this new limit was probably me still trying to use a washer (which I had reduced to 8mm in these pics) rather than getting something machined properly. I was also injecting the water into the nozzle from the centre of the nozzle base, whereas I knew other were injecting it through the side wall of the nozzle to allow it to spin within the nozzle and move through the sponge and tubes more evenly. I also still had to figure out how to design the nozzle to be neater and accept an acrylic tube to pass the fibre optic light through the nozzle.
Prototype 3 - Day 3
So, skipping forwards another day that was spent waiting for more components... I had my 3rd nozzle. this one needed to work, as I had to build 6 of them and meet my deadline to get the shipped out to the project they're for!
This time everything was kind of the same in principal, but all of a much higher standard. The basic (bendy) straws I had been using so far were replaced with higher quality and narrower (3.5mm) straight straws, of a much higher quality material. Their diameter was measured with a micrometer and I used CAD software to calculate the correct volume to pack in to ensure they were as tight as possible but not so tight they would deform at all. They were built up within the nozzle very carefully to ensure no two straws crossed.
The outlet was just 1mm stainless steel plate drilled very carefully with a cobalt bit to 9mm. One thing I had discovered by this point is that there is no reason to put a 'razor edge' on the outlet. If you look carefully at a flowing nozzle you can see that the water contracts as it passes the inner edge of the outlet, so it makes no difference if the outlet is chamfered or not, as the water won't touch any of the material after it has passed the hard inner edge anyway. I think that using machine turned outlets actually causes a bigger problem too - as they can only be the diameter the lathe can handle, which means they must be fastened to another plate or cap to locate them to the top of the nozzle - however they're fixed has to introduce turbulence as the surface can never be totally perfect if two different materials are used (due to the water passing less cleanly over different materials). So my outlet nozzle was a stainless disc the diameter of the nozzle itself, with a single hole drilled in the centre as an outlet, and a second hole drilled and tapped at the top edge to accept a small valve to bleed trapped air. Therefore, the water in the nozzle encounters nothing other than smooth stainless sheet until it finds the outlet hole in the centre.
I also used finer grades of sponge in the nozzle, cleaned up any rough edges added a little extra length to allow the water to settle as evenly as possible before encountering the new skinny tubes.
The end result achieved the 12' height on the first run - there is just one image below for now but if you view the youtube link you can see the full height, and that the laminar stream does enter the water softly as it's still holding together well. The second video is the same nozzle turned up to about 14' (just be messing a round!) and with the fibre optic light running.
And finally I swapped to a multi stage pump as I know they deliver very smooth flow. I coupled this with an inverter with frequency control so I could precisely control the speed of the pump (and iron out voltage spikes) and then sent the flow to the jet via an expansion vessel charged to 1.2bar. The jet runs at 0.9 bar so the small pressure differential in the vessel easily softens any remaining fluctuations.
Sorry about the video quality - this is all on iPhone at the workshop..
So I just wanted to say a big thank you to all the guys who have built their own nozzles and shared their experiences. It really has been of great value.
For those of you that want to know the specs of the final nozzles:
Diameter: 160mm (plus the width of the flanges)
Length: 550mm
Jet height: 12' as all laminar, 20' as laminar until about 3/4 where it breaks up
Flow rate: 17 lpm
Pressure at pump: 0.8bar
Pump type: Multi stage centrifugal (the multiple stages remove most pressure spikes)
Low pass filter: NONE - I use expansions vessels, they work the same way by using an air pocket to act as a shock absorber but are waaaayyyyyy better at the job and can be pressurized to acheive the best result.
Outlet nozzle: 9mm non chamfered, non turned. Just drilled to give a perfect 90 degree hard edge.
Light source: 48w LED fiber optic projector.
Air bleeding: a simple 4mm ID tap with silicone tube attached, this continuously removes air/water from the top of the nozzle and returns it back to the pumps sump pool.
Deuce- Nozzle Newbie

- Posts : 1
Join date : 2015-10-16
Re: 12 foot tall laminar jet - thanks for the help!
![]() Ike Sun May 01, 2016 11:11 am
Ike Sun May 01, 2016 11:11 am
Your build looks awesome! Your stream coherency looks phenomenal. Good job! 
Ike- Nozzle Novice

- Posts : 74
Join date : 2010-05-03
Age : 39
Location : Wyoming
Flow rate
![]() Qays Hassan Thu Jun 02, 2016 3:22 am
Qays Hassan Thu Jun 02, 2016 3:22 am
Hello thank you for sharing your information with us, I am having a bit difficulty with pump size and flow rate.
as you have mentioned that your flow rate is 17 liters per minute, the required height is 12 feet and outlet nozzle dia is 9mm and from these values i'm having a velocity of 8.47 m/sec which corresponds to a flow rate of 32 liters per minute..
Am I doing something wrong? or is there any thing which I have missed? need urgent help
Thank you
Qays Hassan- Nozzle Newbie
- Posts : 4
Join date : 2016-04-28
apex190- Nozzle Newbie
- Posts : 2
Join date : 2016-06-12
» First Try at a Laminar jet
» First Laminar Jet
» Laminar bounce
» China Laminar Jet
» Jetty's Wifi Web Based Laminar Jet Project
» First Laminar Jet
» Laminar bounce
» China Laminar Jet
» Jetty's Wifi Web Based Laminar Jet Project
Page 1 of 1
Permissions in this forum:
You cannot reply to topics in this forum|
|
|